
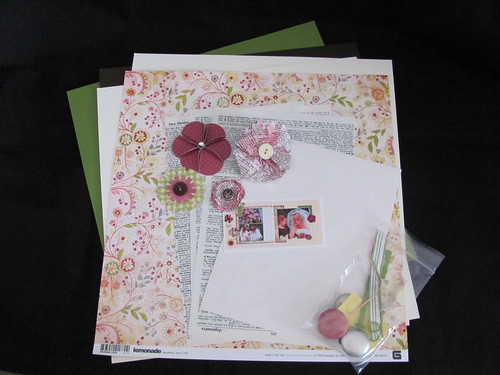
This class was a stretch for me. I'm the kind of person who would much rather just go to the store and buy already made flowers to stick on my layout.....but I wanted to learn something new and this looked interesting plus I figured if I learned how to make some paper flowers then I could use some matching patterned paper or if I learned how to use some ribbon to make flowers I could actually finally use some of that ribbon accumulating in my craft room.
So the class info stated we'd learn learn FIVE creative ways to create fabulous handmade flowers from a variety of papers, ribbon, and fabric. Plus we'd use some buttons, rhinestones and other embellishments to create versatile flower centers. I was ready for the challenge - and a challenge it was! I will tell you right now - fabric flowers are NOT my thing ;)
We were also given opportunity to use the i-Top tool. I had never used this item before. It was really cool to see and use this tool. I'd seen it in the stores but had no clue what it was. It's a essentially a brad maker. You can make your own brads with paper that you have that of course, match your layout! The brads made could also be used for flower centers.
We received plenty of supplies for all the flowers, a two-page layout as well as additional instructions for another EIGHT additional flowers to try here at home. I can't wait to have some time to experiment and play.
This is definitely a technique that takes some practice but it's more than doable and fun. (Remember I said we made one from fabric but that's not my thing so I have nothing to show you!)
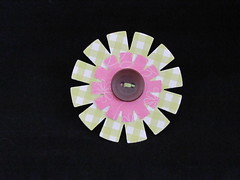
This one was very simple. We used 2 different sized punches, adhered them together and put a button for the center. Sometimes simple is just what is needed.
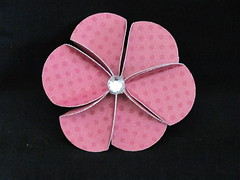
This one was created from 6 - 1 1/4" circle punches and then 5 of those were folded into small little "pizza" shapes. Using adhesive they were put onto the remaining circle. Popped up the little "pizza" shape just a bit and then using a glue dot added a rhinestone for the center. Didn't take too much time but may take a little practice to get just right.
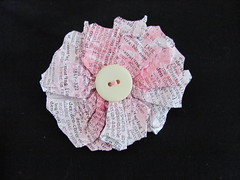
This paper flower is my favorite. This one took a little more time but it was fun! I can see myself using this a lot in the future. We cut a large circle out of dictionary paper and then sprayed it with just a touch of Shimmering Mist (a liquid paint, acid free and safe to use in albums) Once that was dry (didn't take long) we just pinched the center and twisted to make a "stem" and "flower". This one takes a little practice and a bit of working with it as well but it's not hard at all. Again we added a little button to be the center of the flower.
2 comments:
Those look cool. I may have to get you to teach me :D
love this album.. I have one sitting around.. i HAVE to get to it.. thanks for inspiration. I'm diggin the flowers too!
Post a Comment